In a previous post I detailed building a dual Xeon workstation using a Supermicro X8DTL-3F salvaged from a used 1U server, and dual Xeon X5680 CPUs.
That was 6 years ago now, and it’s time for some upgrades.
I was finding that, with air cooling, CPU#1 was ingesting hot exhaust air from CPU#2 and was therefore running hotter. Nothing concerning, and I never experienced worrying temperatures, but I thought it might be fun to investigate AIO water cooling, since I already use AIO water cooling on my main PC. I decided that twin 120mm AIOs would work, not least because twin 240mm rads would take up too much space, and also because Xeons are fine with running a little hot. Besides, the stated TDP of these coolers is higher than that of the air coolers I was using.

Credit: Cooler Master
I decided on the Cooler Master MasterLiquid Lite 120mm because, although it is a much older design than the newer more sexy Cooler Master MasterLiquid ML120L v2, it was way cheaper and I really do not need RGB lighting on this PC.
Unfortunately, it turned out that my Cooler Master Storm Enforcer case did not have the clearance between the motherboard and roof to take the radiators. Not just the depth but also the length of the 2 x 120mm rads. It would happily take 2 x 120mm fans but not the rads. Not even with the fans mounted externally.
I really should have foreseen this, as it was from trying to fit water cooling to my main PC that had caused me to buy a new case and which had made this one spare in the first place. Ah, hindsight.
If the motherboard were smaller it would probably have managed a “rads then fans” config (ie a pull config) but the clearance was just not there for my motherboard as the rads fouled the RAM and also the power connectors.
I considered abandoning the whole project at this point, but I had bought the MasterLiquid Lites from eBuyer and due to their Returns Policy I would have been out of pocket by a lot due to return postage and restocking fees, so I pushed on. Besides, I had a bee in my bonnet about this water cooling now.
Raidmax Scorpio V 503WB
I looked around for better cases, and found that very few now have front drive bays, and I have a requirement for them.
I initially tried the Raidmax Scorpio V whose dimensions looked like they might be sufficient, and which seemed to be confirmed by some online reviews. It was for sale from eBuyer on a special clearance (hah!) offer for an incredibly cheap price, so I gave it a punt.
Unfortunately it transpired that it did not have sufficient clearance after all, and suffered from similar issues to the Enforcer. Indeed, it even has a passing resemblance to that case. It would probably be fine on a smaller motherboard, but not for my one.
Due to eBuyer’s aforementioned Returns Policy, it wasn’t worth trying to send back. I will hold onto it for a few years until it becomes retro / desirable and then sell it as used.
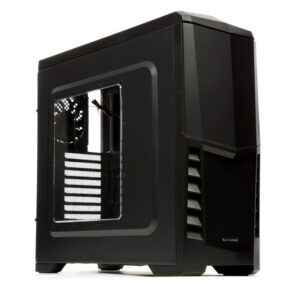
I then did some further research and determined that the Cooler Master CM 690 III ADVANCED would work, not least because it is a full tower case. It’s out of production now (superseded by a newer model that has no front drive bays) but I managed to buy one, used, on eBay for an absolute steal.

Cooler Master CM 690 III
The seller said he barely made anything on the sale but he was fine because it had gone to a good home and it was less clutter in his house.
Everything fitted just fine and I was back up and running in no time.
However, around this time I had just replaced the X8DTL-3F in my NAS for a X8DTL-6F in order to get a SAS 2008 controller. Since I am now predominantly using SSDs on my workstation, I decided that it too might benefit from an X8DTL-6F motherboard.
Initially I purchased another X8DTL-6F server, which arrived, I stripped down, swapped across the CPUs and RAM from the X8DTL-3F, and then fitted, but then when it was all up and running I realised that I’d actually be better off spending more and getting something more powerful and newer.
Fortunately I had only spent £50 on the X8DTL-6F system so it can go into storage for spares for my NAS or else I can sell the parts.
I did some research, and then did an eBay search for a X10DRL-LN4 or X10DRL-i or X10DRL-c or X10DAL-i as any of these would be suitable. The important thing was dual Xeon and a standard 12″ x 10″ (30.48cm x 25.4cm) E-ATX form factor, rather that the proprietary Extended E-ATX.
My eBay search yielded a B-Grade used Supermicro SuperServer 6018R-MTR 1U server from a UK-based VAT-registered business seller. It was fitted with an X10DRL-i motherboard, two E5-2680 v3 12-core CPUs, a frankly excessive 256GB of DDR4 RAM, and twin redundant PSUs (which must surely have some resale value). It seemed ideal and I made on offer for it which was accepted.
Then, whilst that was on the way, I decided that I would actually like faster CPUs with more cores, so bought a pair of used E5-2695 v4 18-core CPUs. I’ll recoup some of the cost by selling the E5-2680 v3 CPUs, some of that 256GB RAM (I think 128GB will be more than sufficient for my needs), the two PSUs, the drive caddies, and anything else that looks like having resale value.
Being a server, there is of course no desktop IO shield for the motherboard but, just like I did with the X8DTL-3F and X8DTL-6F, I managed to source one on AliExpress.
I also decided to replace the rather chunky Asus GTX 1050 GPU with a much more svelte nVidia Quadro M4000 8GB which I bought, used, on eBay for a very reasonable £74.
Eventually everything arrived, and I fired up the server to test it. Initially there were some memory errors, but when I opened up the case I found some of the DIMMs had become unseated in transit. I reseated them, tried again, and everything booted up fine.
Next task was to strip it all down to remove the motherboard, and then swap over the CPUs.
This was simple to do, and I then installed the motherboard in the desktop case, being careful to make sure that all stand-offs lined up and there were no extra ones. I made a cardboard template to be 100% sure. There were a few areas where the motherboard wanted a standoff but my case would not support it, so I fitted self-adhesive rubber pads in those areas. It just so happened I had some cut-to-size self-adhesive rubber that was exactly half the height of a standoff, so a double layer of a small square of this was ideal.
Everything installed fine, and I found that LGA2011-3 serverboards take exactly the same mounting as desktop ones, so I was able to simply use the supplied LGA2011 fitting kits supplied with my water coolers.
The fans being labelled FAN1-6 and FANA & FANB was a little confusing at first, and the User Manual wasn’t very helpful, but after some googling I discovered than Fans 1-6 are on Cooling Zone 1 (which goes on CPU temperature) and Fans A & B are on Cooling Zone 2 (which goes on system temperature) so I connected the case fans to FANA and FANB, and connected the CPU radiator fans to FAN1 & FAN2, leavings fans 3-6 unused.
So, it was time to flick the switch and boot up.
However, when I booted up I got memory errors:
Failing DIMM: DIMM location. (Uncorrectable memory component found) (P1-DIMMA1)
Failing DIMM: DIMM location. (Uncorrectable memory component found) (P2-DIMME1)
Checking seating, and even swapping DIMMs around to see whether it was bad DIMMs, did not rectify it and the same errors occurred each time. These locations happen to be the first location for each CPU, and are the ones you would use if you were only using one DIMM per CPU.
Now, do you recall my woes on doing a CPU swap and not checking if I needed a BIOS update first? Well, you guessed it. A google search gave several Supermicro support requests / FAQs that said that if you are running E5-26xx v4 CPUs then you must be running BIOS v2.0 or higher.
Since I couldn’t even boot into a UEFI shell with these errors, I had to perform a CPU swap back to the original CPUs in order to check the BIOS version and update it.
After reinstalling the v3 CPUs it booted fine without errors, and I was able to boot into BIOS and, sure enough it was BIOS v1.0c (dated 2015). I then proceeded to flash it to the latest BIOS, which is v3.4 (dated 2021). Then I swapped the CPUs back over to the v4 ones (good job I have plenty of thermal paste!), and everything booted fine without error.
Unfortunately, because so many components had changed, my Windows 10 Pro install became deactivated and could not be re-activated with the existing Product Key as it is an OEM licence. I therefore needed to buy another OEM licence, which was an unwelcome extra expense.
Obviously my Ubuntu install was fine with the change in hardware.

The finished install
So now I have a much newer motherboard, with much faster CPUs with sexy water cooling, and a slim graphics card, in a better case. I think the only things that remain from the original workstation are the PSU and the hot swap drive bays, so it’s not far off from being Trigger’s Broom.
The costs on this build, including the cases, the water coolers, the abortive purchase of the X8DTL-6F system, the SuperServer, the CPUs, and the graphics card, is roughly £650 but I hope to reduce that figure significantly by selling off unwanted items. I’ve already managed to sell the GTX 1050 for £40-odd and the Enforcer case for £65-odd.
The costs would have been massively less if I had just bought the server and put the motherboard (with the CPUs it came with) into my existing case using existing air cooling. Had I done that then the cost would have been only £270 so it’s entirely my fault for going overboard.
Update 1:

NZXT Sentry 3 Fan Controller
I was finding that the case fans were excessively noisy when allowing the motherboard to control them.
Rather than mess around with trying to set up custom fan profiles with IPMI, I decided to simply put my old NZXT Sentry 3 Fan Controller back in and control the case fans that way.
Since the CPUs have water cooling, I’m happy for the motherboard to continue to control the fans on those as they are effectively separate from the case.
The only downside of the Sentry 3 is it only has one temperature probe input, and does not read any temperature info from the motherboard, but for my system I think that’s sufficient. But only because the CPUs are effectively separated from the case interior and are able to get on and do their own thing.
Update 2:
A mild amusement / irony. The other 128GB of RAM wasn’t getting so much as a nibble on eBay, not even at a very keen Buy It Now price and with Offers Accepted, so I put it back into the workstation for an entirely excessive 256GB. Then the very next morning I awoke to a notification saying it had sold, so I had to take it out again.
Still, the £160-odd that I got for it represents 59% of the cost of buying the SuperServer, so it was definitely worth selling.
Update 3:
Totally fed up with the quirks of using a server board for a workstation, not least just how long it takes to boot up. But I think this will remain my favourite build forever. I just love dual CPUs and having AIO water cooling for each is awesome. And I love how clean and minimalist it is. I love this build. But, no, not going to be a regular use PC any more.
Pingback: Mid-2010's Retro Computing PC build - Data Hamster
Pingback: 2014 Z97 Retro Computing PC build "MissyMSI" - Data Hamster